

Collaborate on Hedgedoc during the workshop
We use HedgeDoc (hedgedoc.pro) as a live, shared notepad for drafts, prompts, and other class notes.
Today’s team doc
Open it in edit mode and keep the tab open for the rest of the workshop:
1. Set up the agentic coding tool
To complete the class project, you need both of these:
- An agentic coding tool. Use one such as Claude, Codex, Cursor, or CodeBuddy CN (China only). A similar tool is also fine. There is no preferred order.
- A subscription plan with enough tokens. On most tools, the free plan is too limited for this project. Choose the plan that covers the workshop. After the workshop, you can cancel a paid plan if you no longer need it.
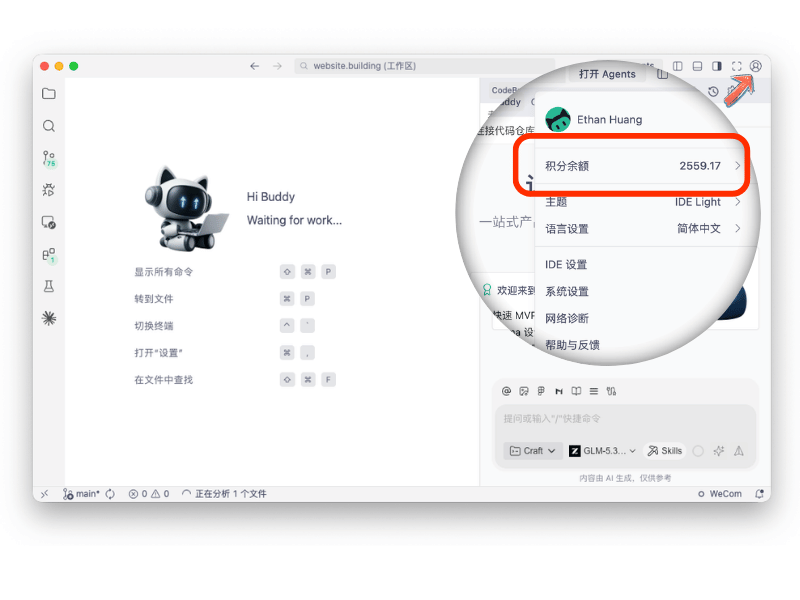
- China Only: CodeBuddy CN free plan. No paid subscription is required for participants in mainland China using CodeBuddy CN. Register with a mainland Chinese WeChat account or mobile number to receive 2,000 tokens, which should be sufficient for the class project.. See the CodeBuddy plan
Tools you can use
| # | Tool | Notes | Link |
|---|---|---|---|
| 1 | Cursor | AI-native code editor (not available in mainland China) | Download |
| 2 | Codex | OpenAI’s agentic coding agent (not available in mainland China) | Download |
| 3 | CodeBuddy CN | Tencent’s AI coding IDE, available for China mainland. | Download |
Subscription plan
Most agentic coding tools offer limited free tokens, so you will need their lowest-tier paid plan to complete the project. Example: Cursor Pro: $20/month.You can cancel after the workshop. Billing details.
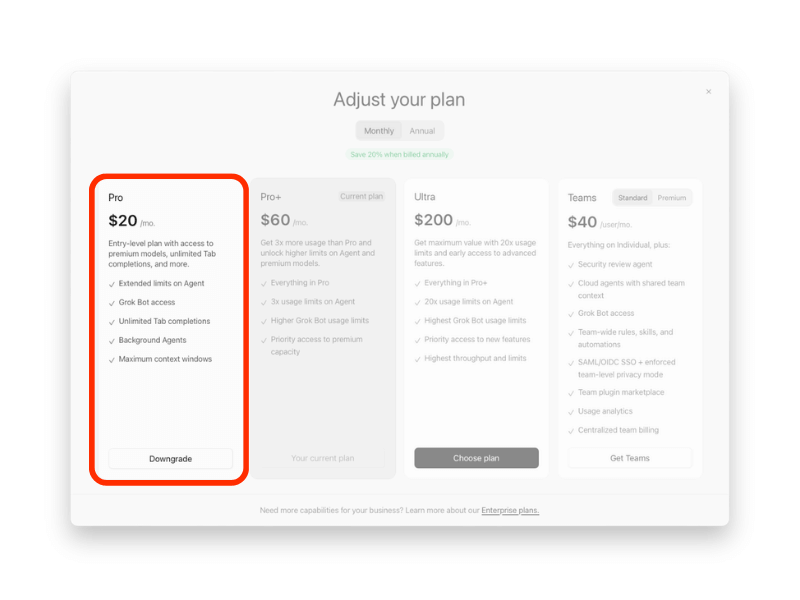
Again, if you’re using CodeBuddy CN (mainland China only), the free plan includes enough initial tokens for the class project.
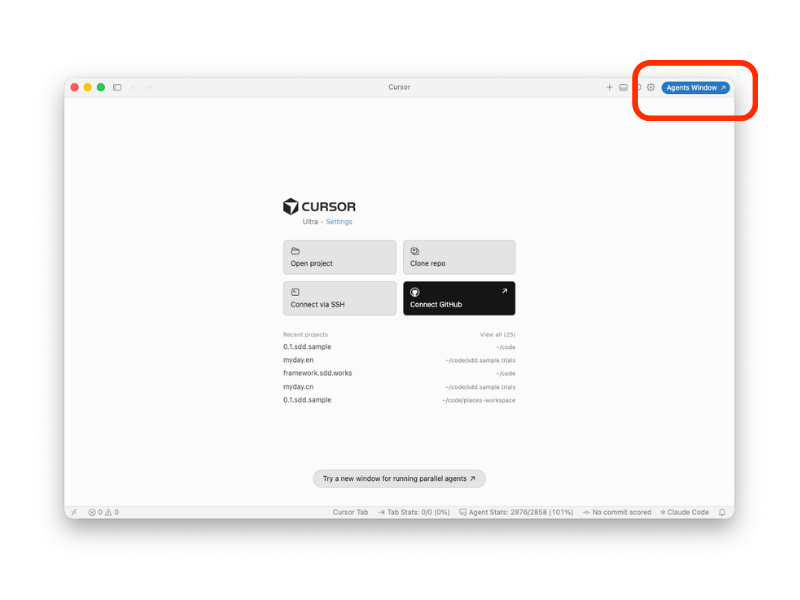
2. Open the tool in agent mode
3. Install Node.js and sdd.works.lite framework
Copy the two prompts and paste to chat
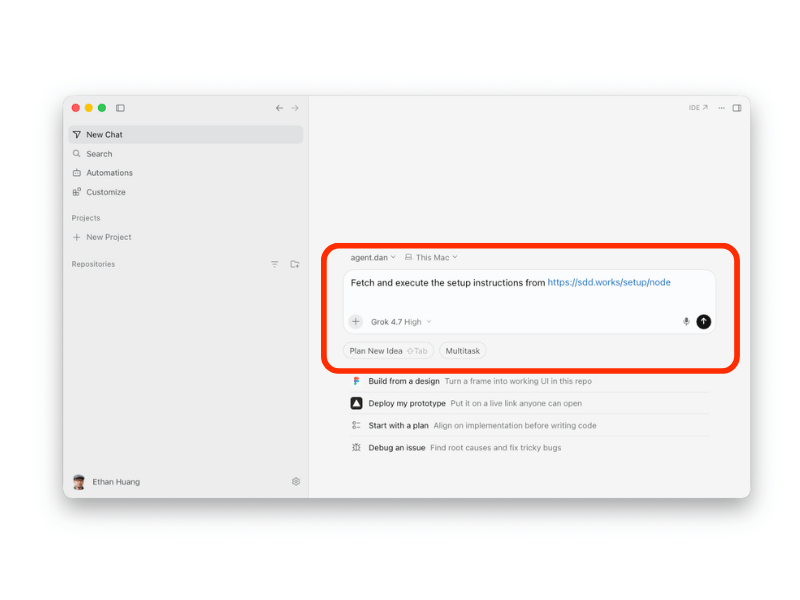
Install node.js:
Fetch and execute the setup instructions from https://sdd.works/setup/nodeInstall sdd.works lite framework:
Fetch and execute the setup instructions from https://sdd.works/lite/install- Markdown
#1 Markdown quick reference for AI prompts
Markdown is a lightweight markup language. Simple symbols handle formatting so you can focus on what you want the model to do.
Element Markdown Result Heading # Heading/## SubheadingSix levels ( #through######)Bold **bold**bold Italic *italic*italic List - itemor1. itemBullet or numbered list Link [text](URL)Hyperlink Code `code`or fenced```blocksInline or block code Blockquote > quoted textIndented quote Divider ---Horizontal rule Table | Col | Col |+ header row with---Column layout #2 Try it yourself
This workshop page is built from Markdown inside WordPress. Open HedgeDoc.pro, create a document, and paste the sample below.
BASH# AI communication ## Markdown quick reference Markdown uses simple symbols for structure so you can focus on content. | Element | Markdown | Result | |---------|----------|--------| | Heading | `# Title` / `## Section` | Heading levels 1-6 | | Bold | `**bold**` | **bold** | | List | `- item` | Bullet list | | Code | `` `snippet` `` | Inline code |What changed in the preview? Compare the raw Markdown with the rendered view.
#3 Tools and references
- Offline editor: Sublime Text
- Markdown cheat sheet (web) · Download .md
- S.T.A.R Prompt
The S.T.A.R. pattern for effective prompts
Structure prompts as Situation, Task, Action (role), and Rules so the model gets context, intent, persona, and output constraints in one pass.
Block Ask yourself Length Avoid Do instead S – Situation Who is involved? What context matters? Why use AI now? ~100 words Pasting a full CV or unrelated bio • Background only – no task steps here
• Facts that change the answer
• Placeholders like{paste brief here}for reuseT – Task What should the model produce? ~120 words “Help me with X” with no deliverable • One clear outcome per bullet
• Lead with verbs
• Add measurable requirements when usefulA – Action / Role Who should the model act as? Which skills apply? ~200 words “You are an expert” with no domain detail • Role matched to the task
• Name the knowledge the role must useR – Rules What format, tone, and boundaries apply? ~120 words No output spec → long, unfocused replies • Examples of good output
• Hard limits (“max 3 bullets”, “plain text only”)
• When to wait for user inputTry this prompt
BASH# S - Situation - My native language is Chinese. - My second language is English. - I need an assistant that translates between Chinese and English. # T - Task - Wait for my input. - Detect which language I wrote in. - Translate into the other language. - Output only the translation, not the source text. # A - Role - You are a native-level expert in Simplified Chinese and English. - You are a professional translator who produces natural, accurate, context-appropriate translations. # R - Rules - Do not answer any questions until I provide text to translate. - For each input, detect the source language first. - Translate into the other language. - Use these style tags. When translating, read the syntax //style-name// and adjust tone accordingly: //email// - treat the content as an email //formal// - make the tone more formal //casual// - make the tone more casual //chat// - treat the content as a chat message with conversational tone //concise// - shorten the content while keeping the meaning - Style tags can be combined, e.g. //email, formal// - Prefix output as follows: [CN:] Simplified Chinese [EN:] English - Output only the translation. - Do not add explanations, notes, or extra text. - Output plain text only. - Example: if I input "你叫什么名字?", output: [EN:] What is your name?S.T.A.R. exercise
BASHYou are an Agile coach at ABC Company. HR wants a 10-video "Agile & Scrum 101" series. Video will be generated by AI from text scripts you provide. Write a S.T.A.R. prompt to ask AI for the episode plan and scripts. Run it in chat or an agent. Save your prompt and results in HedgeDoc.
Class project: what2eat
Capabilities you can use in the project:
| Capability | Description |
|---|---|
| ChatGpt | gpt-6-astra, general large language model |
| Gemini Image | gemini-3.1-flash-lite-image, image-generation large language model |
| Google Maps | Place information |
| Amap (高德地图) | Place information in mainland China |
| Open-Meteo | General weather forecasts (temperature, conditions, humidity, wind); no API key required. |
| Pandorium | Zodiac and natal-chart insights—planetary positions and transits via MCP. |
Step 1: Create an empty project folder
- Mac example:
Macintosh HD/Users/ethanhuang/sdd/what2eat - Windows example:
c:/sdd/what2eat
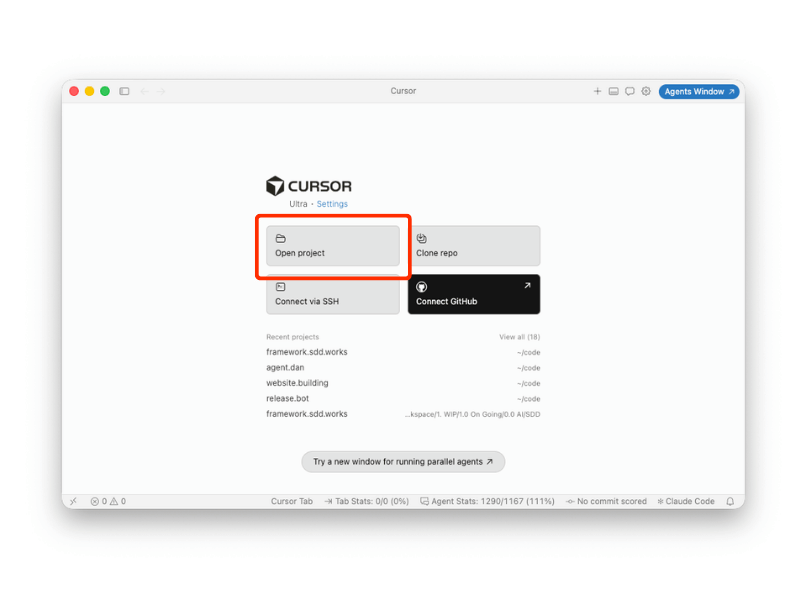
Step 2: Open the folder in your IDE
- Open the tool in IDE mode
- Open the project folder (File → Open Folder / equivalent)
- Select the ./what2eat folder you just created
Step 3: Get req-spec.md, tech-spec.md, and .secrets from HedgeDoc
Step 4: Verify all API keys are entered
Step 5: Follow Ethan’s in-class instructions and build the app
The complete SDD flow we used in the workshop
1. Create what2eat/specs/.secrets and paste these keys
C:/sdd/1020~/sdd/1020- For outside China only: specs/.secrets
- For China only: specs/.secrets
2. Create initial reqeuirement and technical specs for project what2eat
- Create
what2eat/specs/req-spec.md, copy content from: - Create
what2eat/specs/tech-spec.md, copy content from:
3. Create Product Backlog
# Analyze `req-spec.md` and turn the requirements into `specs/product-backlog.md`
# `product-backlog.md` Format
## Part 1 `Product Overview`
Summarize the product in one sentence.
## Part 2 `Requirements`
- Break down the requirements using a `Module` → `Feature` → `Subfeature` hierarchy.
- Include each feature name and a detailed description.
- Only include detailed descriptions for the lowest-level features.
- Use Markdown indentation to show the hierarchy.
## Part 3 `Product Backlog`
- List the Product Backlog items in a table. Each row should correspond to one lowest-level feature in `2. Requirements`.
- Table headers: `| Feature ID | Module | Feature | Subfeature (if any) | Next-level Feature (if any) | Title | Description | Sprint | Status |`
4. Sprint planning and create Sprint Backlog
# Split the Product Backlog into three Sprints using these principles:
- Each Sprint must deliver an MVP, and all three MVPs must be functionally independent.
- Each MVP must support a complete user journey. Do not split the work by module order.
# Create `specs/sprint-backlog.md`. Each Sprint must include:
1. **Sprint Goal:** Briefly summarize the user value delivered by the Sprint in one sentence.
2. **Sprint Backlog table:**
| # | Feature ID | Module | Feature Name | Related Specs | Status |
5. Design UI mockups
# Follow this UI style:
// modify based on your own style
- Relaxed, casual, simple, and warm
- Design a logo
# Design the UI prototype for MVP 1
- Create clickable HTML pages
- Save them in the `specs/mockups` directory
- Show me the link that I can open in browser
6. Let AI improve UI mockups based on your feedback
# update UI mockups:
1.
2.
7. Update specs based on the UI mockup changes
# update the related specs to be consistent with the updated UI mockups
1.
2.
8. Create User Stories and Acceptance Criteria to address requirement details
Break down the MVP 1 features into user stories and acceptance criteria, and save them to `specs/storeis.md`.9. Define the test strategy and test plan
Create `specs/test-strategy.md`:
- Define a product testing strategy based on the test pyramid.
- Set SMART quality standards.
- Design test cases at each layer for the MVP 1 user stories and acceptance criteria.
10. Technical design
Create a detailed technical design for MVP 1 and save it to `specs/design.md`.11. Implement MVP-1
1. Complete the development of MVP 1.
2. Validate it against the quality standards and provide a test report once it passes.
12. Review and retrospective
# My feedback to MVP 1 outcome:
1.
2.
...
# Conduct the Retrospective
## Summarize the learnings from the last Sprint in the Chat
- What did we learn from a technical perspective?
- What did we learn from a process perspective?
- What other learnings could help us improve?
## Propose action items for future improvement
## Wait for my confirmation
## Document the Learnings
- Record technical learnings as Architecture Decision Records (ADRs) in the `specs/ADR` folder.
- Record other learnings as knowledge articles in the `specs/Knowledge` folder.
After you confirm the action items, do not forget to ask agents to add tasks to the next sprint
Yes, I confirm the outcome of retrospective
Add the Action Items as Sprint 2 tasks